
Smart fields make your projects dynamic by auto-filling information on your behalf. When a user creates their own project from a template, Marq will match the smart fields to the project owner's profile information.
Examples of using smart fields:
- Quickly add your company name, logo, and slogan
- Create personalized projects with the user's contact info and picture
- Applying data or images from a data source
Types of smart fields
1. Profile
These smart fields change depending on the user's account information. For example, a sales representative's name, phone number, email, etc.
Below is the list of standard profile smart fields. If you need a different smart field, add a new custom smart field.
- First Name
- Last Name
- Full Name
- Email
- Title
- Company
- Cell Phone
- Work Phone
- Address
- Website
- Profile Image (learn more)
- Logo (learn more)
2. Team
Team smart fields refer to the entire organization. These smart fields will be the same for every user on your account. Team admins manage team smart fields in the admin panel.
Team admins can add as many team smart fields as needed. Some ideas include:
- Headquarter Address
- Company Name
- Slogan
- Office Phone
Note: Team smart fields are only available on our Team and Business subscriptions.
3. Custom
You can create as many custom fields as you like. These will be treated like profile smart fields, as each user will have their own value.
4. Data Automation
With data automation, you can connect a Google Sheet, XML, or your Multiple Listing Service to Marq. This allows you unlimited possibilities of connecting data to a project. Examples of data automation include: product spec sheet, employee directory, property listings, and much more.
Learn more about data automation here.
Note: Data automation is only available on our business subscription.
5. System
Similar to the other smart fields, you can insert system smart fields to your project. These include:
- The project's creator name
- project name
- Date and time
- Last modified by
- Page number
- Page count
To add a system smart field, open your project and click "Insert", then select one of the options mentioned above.
Add smart fields
There are three ways to add smart fields to your Marq project.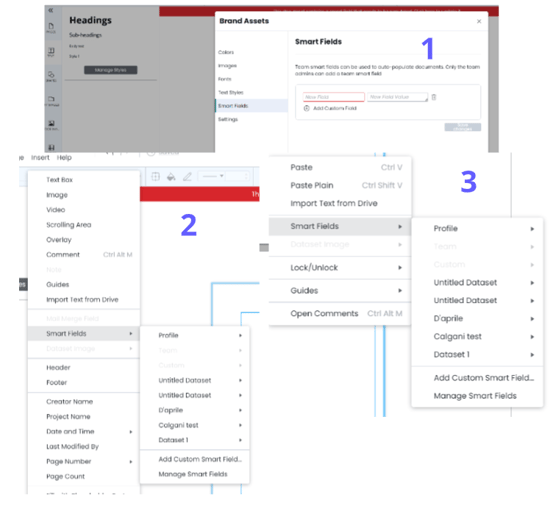
To replace pre-formatted text with a smart field:
1.) Highlight the information you would like to replace, click "Insert" in the menu bar, then select "Smart Fields".
2.) Right-click on a highlighted word and select "Smart Fields" from the menu.
To insert a new smart field with default formatting:
3.) Click the text icon in the content pane. Under the "Smart Fields" tab, click on the drop-down menu to select the type of smart field. Simply drag and drop the desired smart field into your project.
Note: If you are the owner of the project, you will see your information displayed in the master template—but once users make their own copy, their information will be displayed as they are the owner of that project.
PRO TIP: When adding your smart fields, remember that the information will auto-fill, so try to account for extra characters. Expand the text boxes to give room for longer information. For example, your name might be Jon Doe. But, it's best to expand the text box for the name field, so it can fit Samantha Johnson's name as well.
Change a smart field
In the event you would like to change a smart field, you can replace it or manually adjust it (if you are an admin or the owner of the template).
To replace a smart field, highlight the existing smart field, then click "Insert" near the top of the editor. Hover over "Smart Fields" and select the new smart field.
To manually adjust the text, right-click on the smart field and select "Convert Smart Field(s) to Text". Now you can edit the plain text.
Edit your smart field
If you are an admin on your Marq account, you can set team smart fields. Team smart fields typically include information like the company name, address, phone, slogan, etc.
Go to your Marq dashboard or main projects page. On the left, select the Brand Assets tab.
Under the "Smart Fields" section, you can add your own fields or adjust existing fields. Click "Save Changes" when you are done. Now, team smart fields will auto-populate according to these values anywhere there is a team smart field.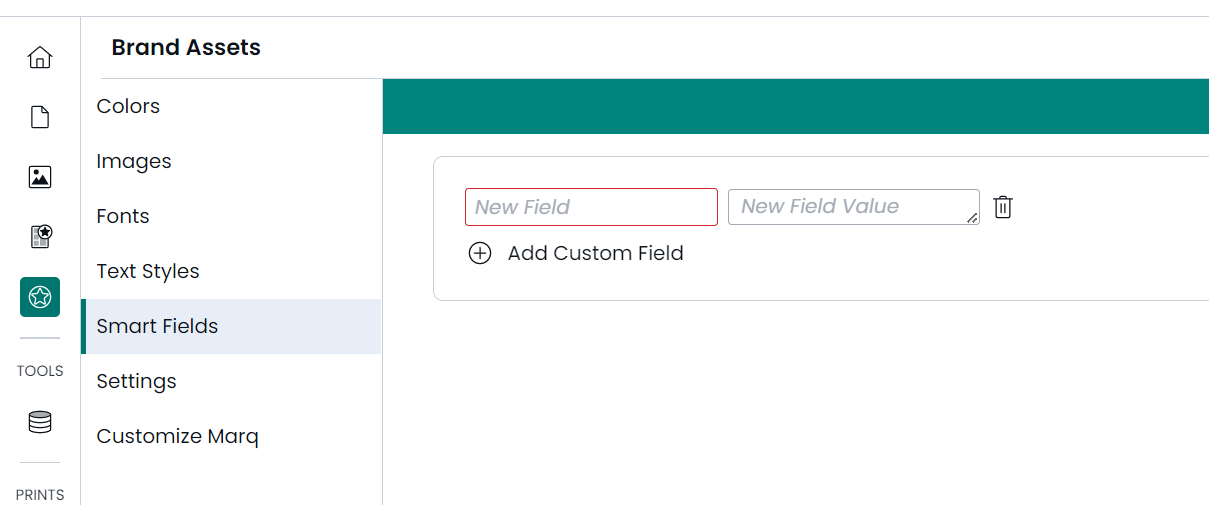
Edit profile and custom smart fields
To edit your profile's smart fields, select your account picture on the top-right.
Navigate to the "Smart Fields" tab on the left. You'll see the standard profile smart fields at the top and any custom fields listed at the bottom. Be sure to save changes after making edits.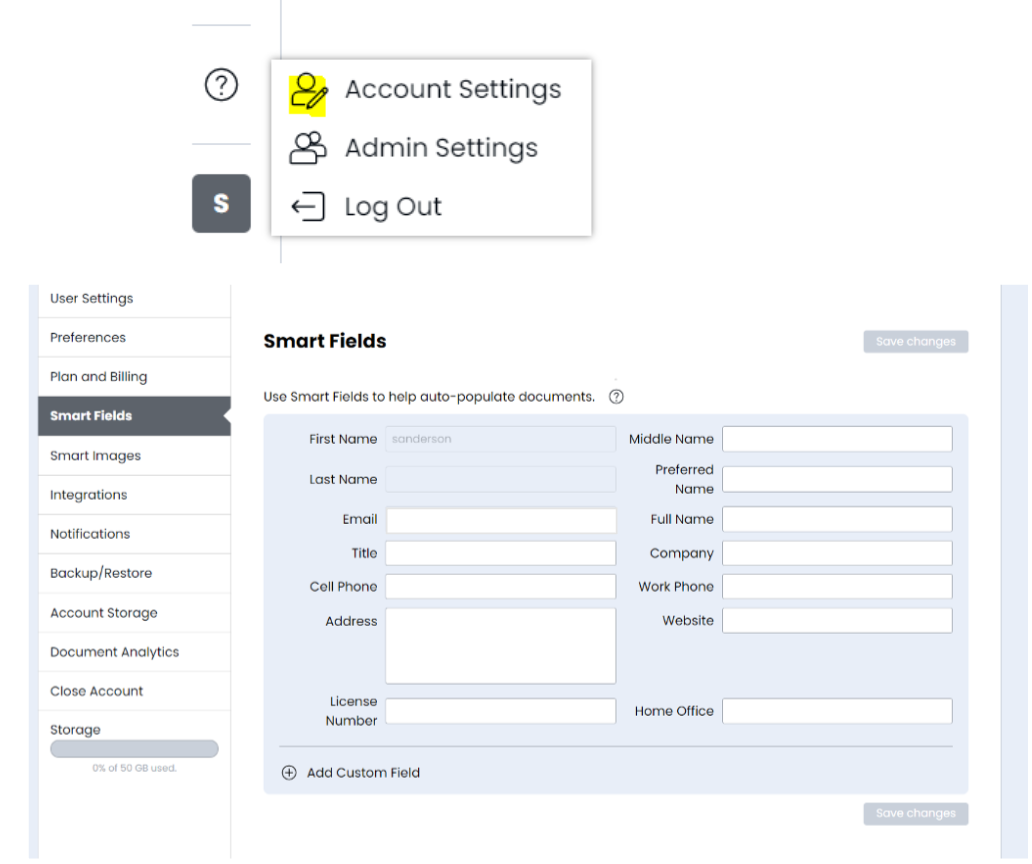
Edit data automation smart fields
Since data is being pulled in to Marq, if you would like to edit a data automation smart field, you will need to edit from the original source. For example, if your data is coming from a Google Sheet, then edit the Google Sheet.
Smart field colors
Each type of smart field has a designated color. See below:
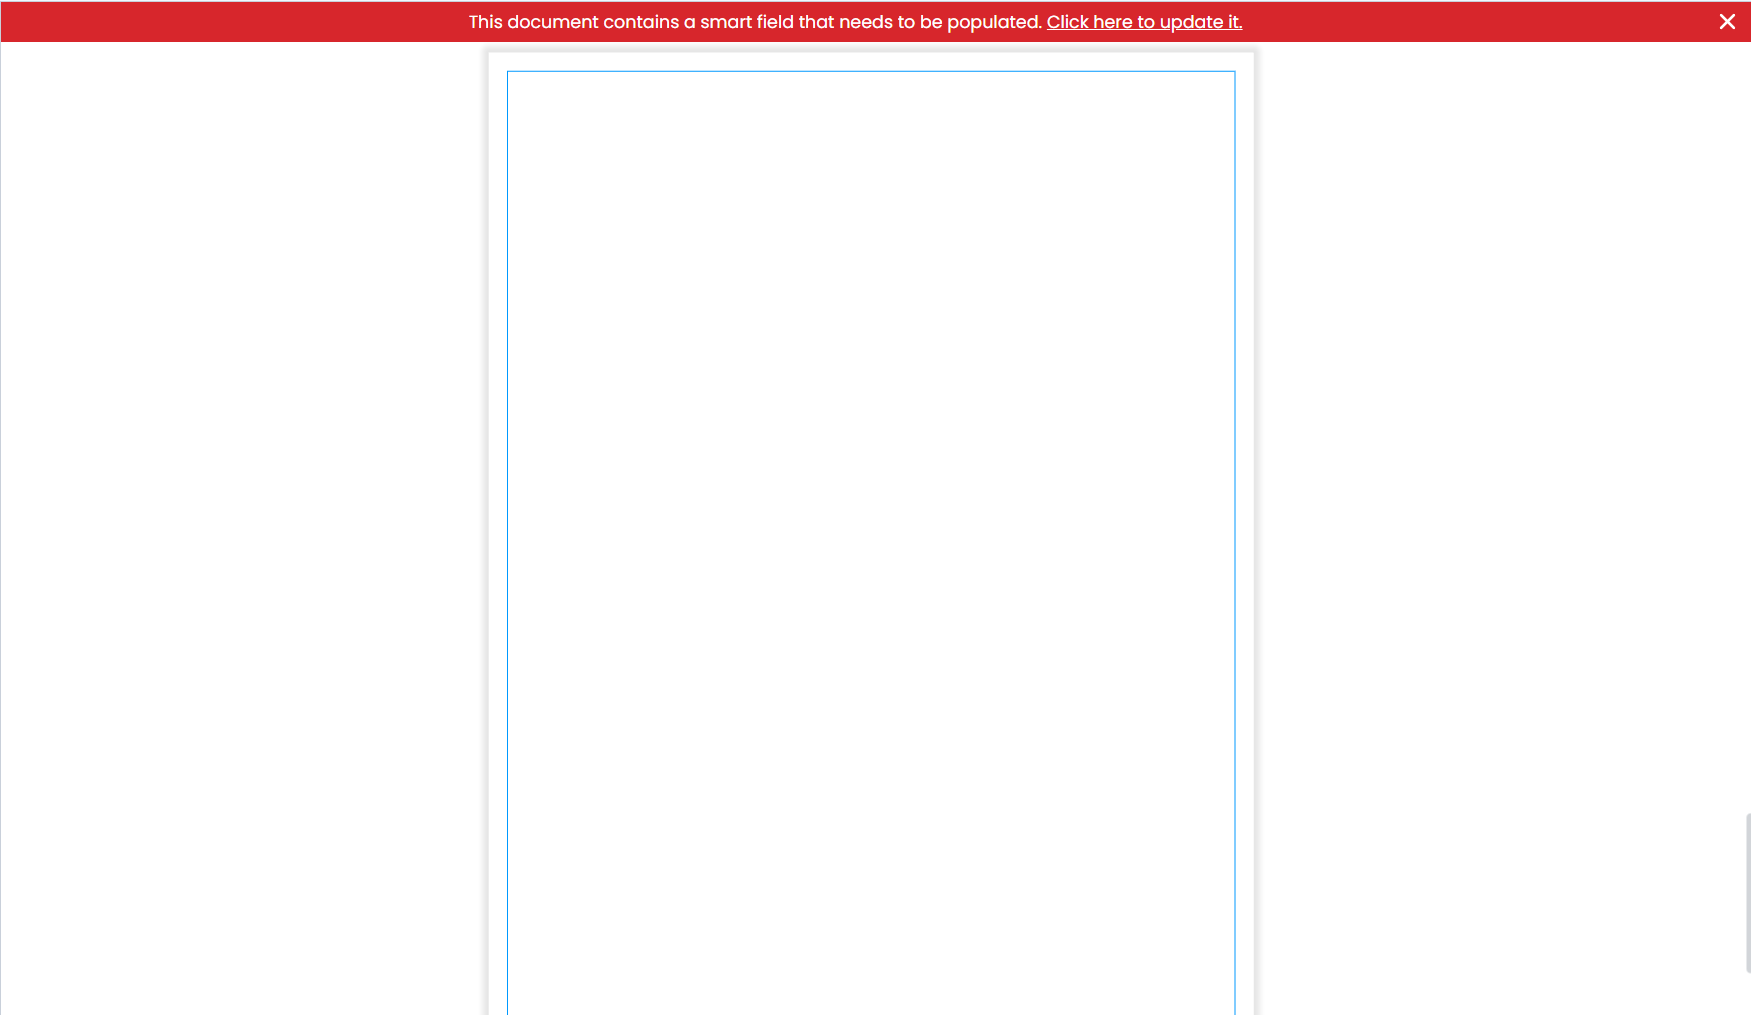
Populating smart fields
If you have some smart fields that are missing, a red warning bar will be displayed at the top of the project. Select the link "Click here to update it". A new window will appear with a list of smart field labels. After entering your information, click "Done" and the project will auto-populate.
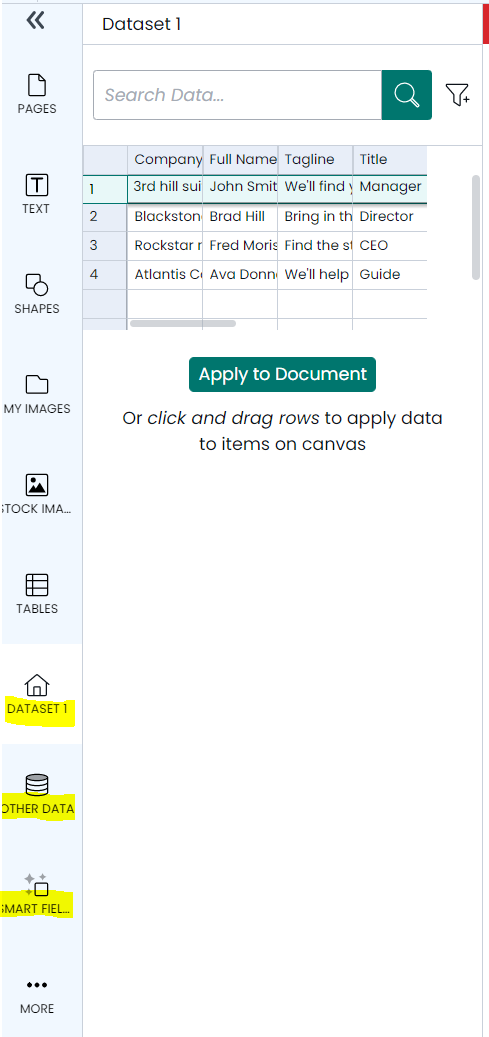
For data automation smart fields, these must be populated by clicking on the data automation icon on the left panel when you're editing a project. Select a row and then click "Apply to project". To learn more about data automation, click here.
FAQ
Why is someone else's information showing in the project?
For profile and custom smart fields, they will display the project owner's information. If your information is not being pulled to the profile or custom smart fields, then it means you are not the project owner.
The fastest solution would be to make a copy of the project, which will make you the owner of the new copy.
Practice
Now that you're an expert, solidify your smart fields by converting projects to templates.