
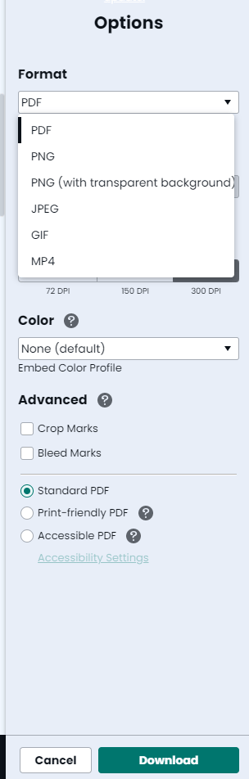
- Download a PDF from Marq
If you go to the editor in Marq, there should be a set of blue buttons in the top right corner. If you don’t see the row of blue buttons in the top right corner of your editor, simply click on the blue hamburger button to expand them out.
- Open Powerpoint and import the PDF
-
To show content from a PDF on a slide Take a picture of the part of a PDF that you want, and paste it on your slide.
-
To keep a PDF file as a support project for your presentation Insert the entire PDF into the presentation as an object that you can open and view during your presentation.
Note: Unfortunately, inserting PDF content is not possible when editing a presentation in PowerPoint for the web. You need PowerPoint 2013 or a newer version to follow these steps.
Insert PDF file content as a picture
-
Open the PDF that you want to insert a picture of, and then switch to PowerPoint.
Tips:
-
Do not minimize your PDF window, and make sure it's the last window you have open before moving to the next step.
-
Make sure everything that you want to capture as a picture is visible in your PDF window. You may need to decrease the zoom level in your PDF to see everything you want to capture.
-
-
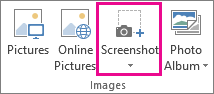
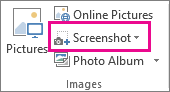
In PowerPoint, select the slide that you want to add the content to, and then, on the Insert tab, in the Images group, click Screenshot.
Note: Depending on your window size, the Screenshot button may appear different.
Your PDF file should be the first thumbnail image in the Available Windows list.
-
Below the thumbnail images, select Screen Clipping. PowerPoint minimizes and shows the window with the PDF file.

-
When your screen gets a white “frosted” appearance and the pointer becomes a crosshair
 , drag to draw a box around the content that you want to clip. (Press the Esc key to cancel the Screen Clipping procedure.)
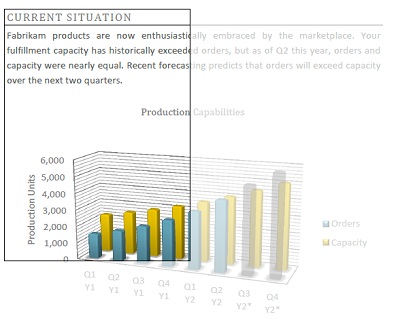
When you stop dragging, the selected area appears on the PowerPoint slide as a picture. You can move it, resize it, crop it, and format it as you like by selecting it and using the Picture Tools Format tab.
Insert a PDF file as an object
-
Make sure the PDF file that you want to insert is not currently open on your computer.
-
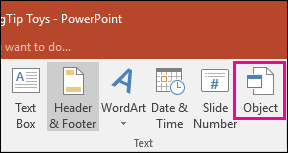
In PowerPoint, select the slide that you want to add the file to, and then select Insert > Object.
-
In the Insert Object box, select Create from file, and then enter the PDF file location; or, click Browse, find the PDF file, and then select OK.
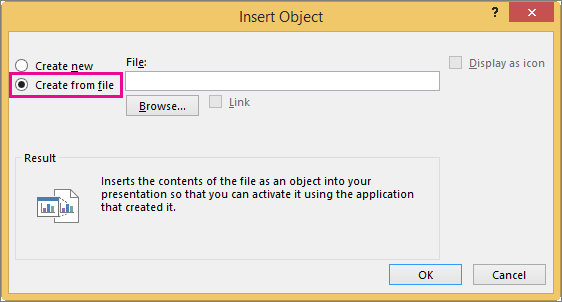
This makes the PDF file part of the presentation file. The quality of the PDF file is reduced with this method, but you can open the full PDF file by double-clicking the image when viewing or editing in Normal view.
Note: If you receive an error when trying to insert your PDF file as an object, make sure you do not have the PDF file open.
Open the PDF from a Slide Show
To open the inserted PDF file during a Slide Show, attach an action to it.
-
In Normal view, on the slide with the PDF file, click the PDF file’s icon or image, and then on the Insert tab, in the Links group, click Action.

-
In the Action Settings box, select the Mouse Click tab if you want to open the PDF with a click, or the Mouse Over tab if you want it to open when you move the pointer over the PDF file icon.
-
Select Object action, and select Open in the list.
-