
Connect viewers of your Marq projects to external pages by adding buttons and links! With our linking options, you can prompt viewers to visit a web page, send an email, or navigate to a different page within your document.
Add Links to Shapes, Images, and Text
To add an external link to a shape, image, or line of text in your Marq project, follow the steps below.
- Select an object on your canvas OR highlight a string of text. Your context pane (on the right side of your canvas) will correspondingly display image, shape, or text settings.
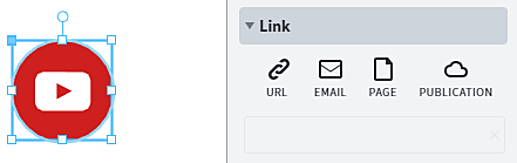
- Click on the sideways triangle next to the word “Link” at the bottom of your context pane.
Three icons and a text box will appear. If you hover over the icons, they will display the linking options that they represent: URL, Email, and Page. - Select your desired linking option. If you are linking to a web page or email address, type or copy and paste the URL or address into the text box and press “Enter” on your keyboard.
If you are linking to another page in your project, click on the text box–which will be converted into a drop-down menu–and select your desired page. - To follow a link in your project, hover over the linked component and follow the keyboard instructions that appear on your screen.
You will know that your link has been successfully added when the grey check mark next to the “Link” tab turns green.
In your final project, simply clicking on the linked text or object will open the linked content. To activate the links, publish your project or download it as a PDF (links do NOT work in projects downloaded as PNG or JPEG files). To test how these links will appear in your published or downloaded project, click the blue "Preview" button across the top of the editor.
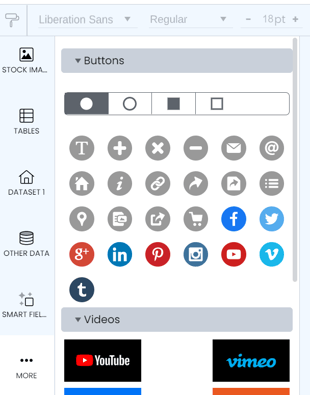
Add buttons to your project (compatible witih embedded projects and emails)
To add a button, drag the icon onto your project. The example below shows the "T" button, which allows you to add your own text. If you want to use your own shape or image, start by adding that to the canvas and follow the same steps below.
Next, add the link to your button. Under the Button tab on the right, select your link option by clicking on the appropriate icon. Insert your URL, email address, page number, or select a published project.
If you're using a shape or an image, the Link settings will be found at the bottom of the Image or Shape tab. See the "Add links" portion of this training to learn more.
To test the button in your project, hover over the button and hold Shift + Ctrl (or Shift + CMD on Mac), then click to activate the link.